
Tecna UK: Artwork Guidelines for Print Part 2
Setting Up Artwork For Multiple Panels
By George Green
George joined Tecna UK as a Design Consultant only recently but has rapidly proven himself to be an invaluable asset to our team. With an impressive background in graphic design, George has gone from strength to strength and here he shares his artwork guidelines for setting up artwork across multiple artboards (panels).
For the second in our series of artwork guidelines, I’ll be providing a tutorial on how to set up artwork designed to span multiple panels. The programme that I’ll be using, and indeed that everyone at Tecna UK uses, is Adobe Illustrator. We like to recommend this programme for creating artwork as it is the industry standard.
The Initial Set Up
Start by creating a new artwork project – click New under the File drop-down menu and the New Document window should pop up.
Within the New Document window, look to the Preset Details margin on the right-hand side and select:
- Your desired panel dimensions
- The number of artboards that you would like to make up your graphic
- The size of your bleed margins
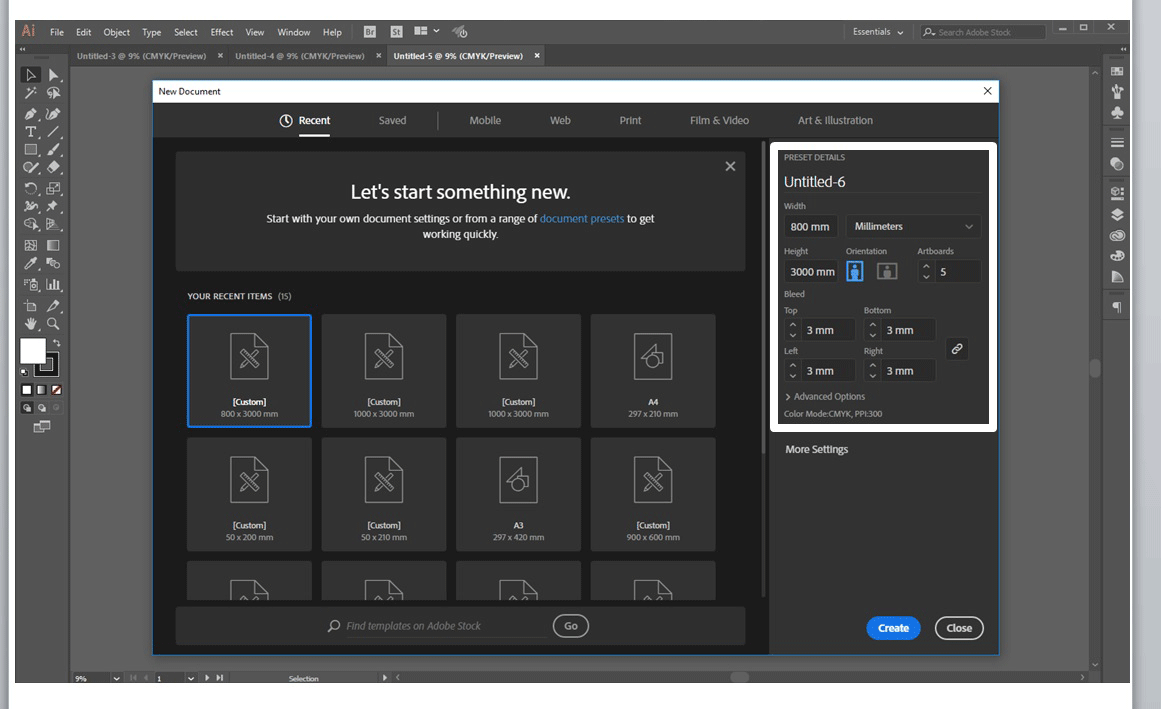
Note: the bleed should be 3mm on all sides if you plan to print your graphic on a rigid or semi-rigid graphic, and 10mm for a tension fabric graphic.
For the purpose of this tutorial, we will create 5 artboards each at a width of 800mm by a height of 3000mm with a bleed of 3mm.
After the bleed size and number of panels have been set, click Create. Your artboards will probably look something like this:
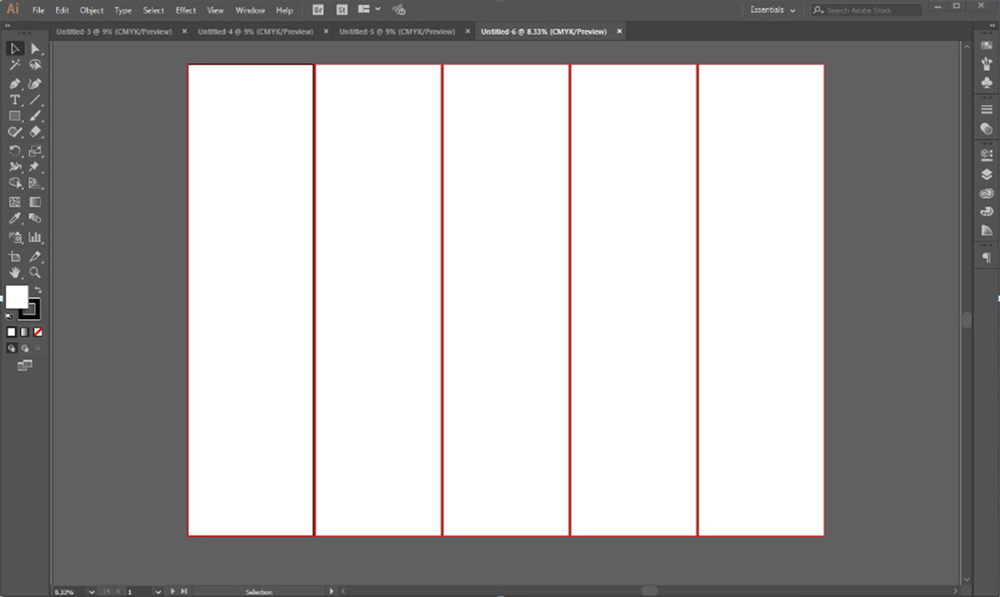
Whilst from afar your artboards may seem like they are touching, zooming in will reveal that there is spacing between them.
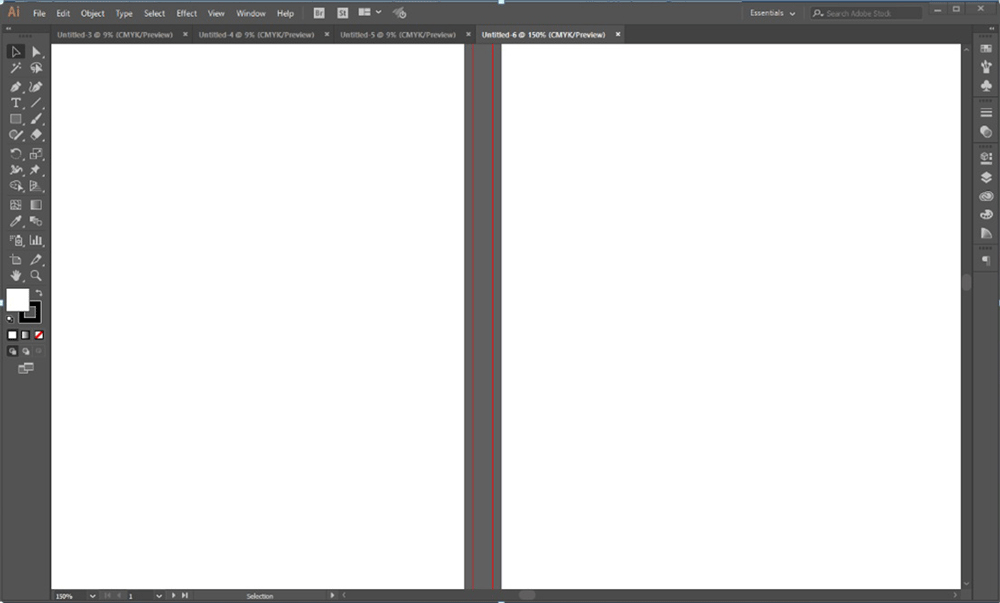
Spacing is fine if you plan for each of your artboards to be used on separate faces across your display. But if you plan for your artboards to stand next to each other to create the illusion of a larger, seamless graphic they need to be positioned so that the edge of each artboard is touching, with the bleed margins overlapping onto the neighbouring artboard (like below).
Why? The reason for this is that it prevents losing the edge of your graphic when cut by printers so that when you come to fit your panels side by side, any edges lost in the cutting process won’t prevent your graphics from flowing seamlessly together from one panel to the next.
There are two methods for positioning your artboards together.
METHOD 1 :
- Start by clicking on the Window tab on the top toolbar and select Artboards from the drop-down menu.
- A small pop-up window should then appear, containing a list of your current artboards.
- Double click on the small artboard icon next to the second artboard on the list (in this case Artboard 2). Another pop-up window will appear.
- In the new window, find the small 9-square reference point diagram next to the X and Y axis fields. Click on the centre-left square within that diagram so that it becomes highlighted in white.
- Next, the X axis field needs to be changed to match the width of the first artboard. For instance, in the case of our example where our artboards have a width of 800mm, artboard number two would need to sit on the X axis at 800mm to meet the side of artboard number one.
- The third artboard would then need to be 1600mm, the fourth 2400mm and so on and so forth.
METHOD 2:
This is an easier, more time-effective method of positioning your framework.
- Click on the Artboard tool from your toolbar.
- Hover over the artboard you would like to move.
- Click and hold, and then slide in the desired direction until the dotted selection line meets the edge of the neighbouring artboard. The edge of the artboard being moved should snap into place when close enough.
- After all of the artboards have been moved together, each of their bleed margins should spill over onto the artboard next to them.
And that’s how you do it! It may sound simple enough, but there have been so many instances in which clients have ended up with graphics that don’t run together smoothly, simply because the bleed and artboards have not been set up correctly. It may have even happened to you. Just keep in mind what you’ve learnt above, and you’ll never need worry about your graphics again.
For more artwork guidelines, check out the first in our series.


Copyright © 2023 All Rights Reserved by Tecna UK Ltd Registered Company Number: 06459394


